
In today’s fast-paced digital world, effective data management is essential, especially for frequent post-submitters. One slip, and hours of work can disappear. That’s why mastering how to backup and restore data is invaluable. In this comprehensive guide, we will walk you through how to do that in Easy Post Submission.
Why is Backup Data Necessary?
Before diving into the details of how to protect your work in Easy Post Submission, let’s get real for a second. Data loss happens to the best of us, whether it’s a glitchy app, an accidental delete, or a device that decides it’s time to take a permanent nap.
When you’re submitting posts regularly, having a reliable backup data strategy isn’t just nice-to-have; it’s your insurance policy because:
How to Backup Data in Easy Post Submission
Before you start to back up your data, let’s not forget the obvious first step: download the plugin and actually activate it on your WordPress site.
To get export data from Easy Post Submission, you can follow these steps:
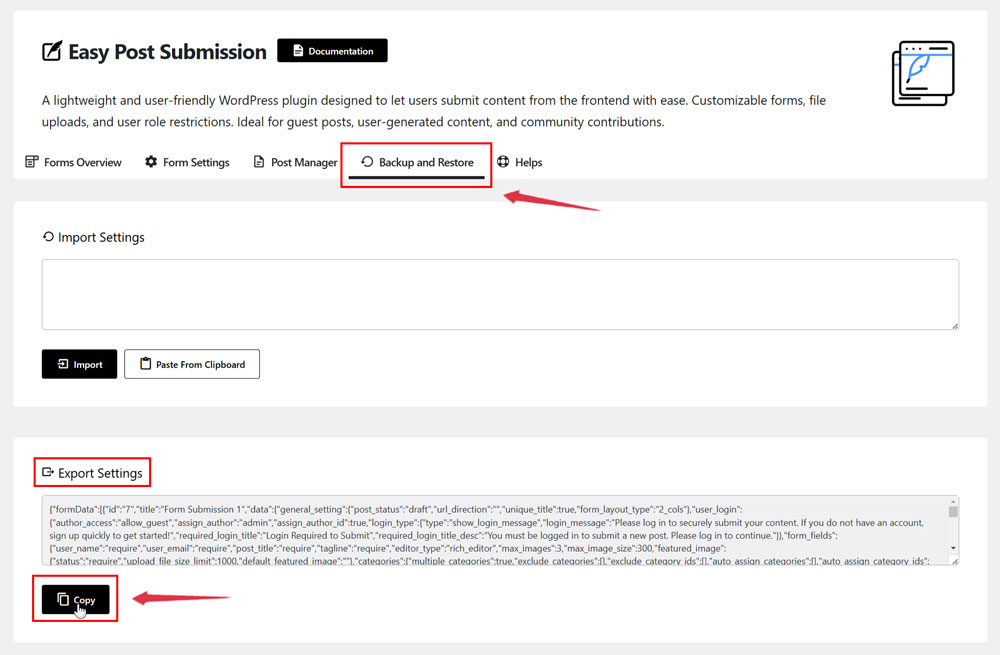
Now that you have the Post Submission Form data, you can save it in Notepad or another secure location. This way, if you ever need to recover or restore your form data due to loss or changes, you can easily restore data back and retrieve your settings.
How to Restore Data in Easy Post Submission
To import previously stored data, follow these steps:
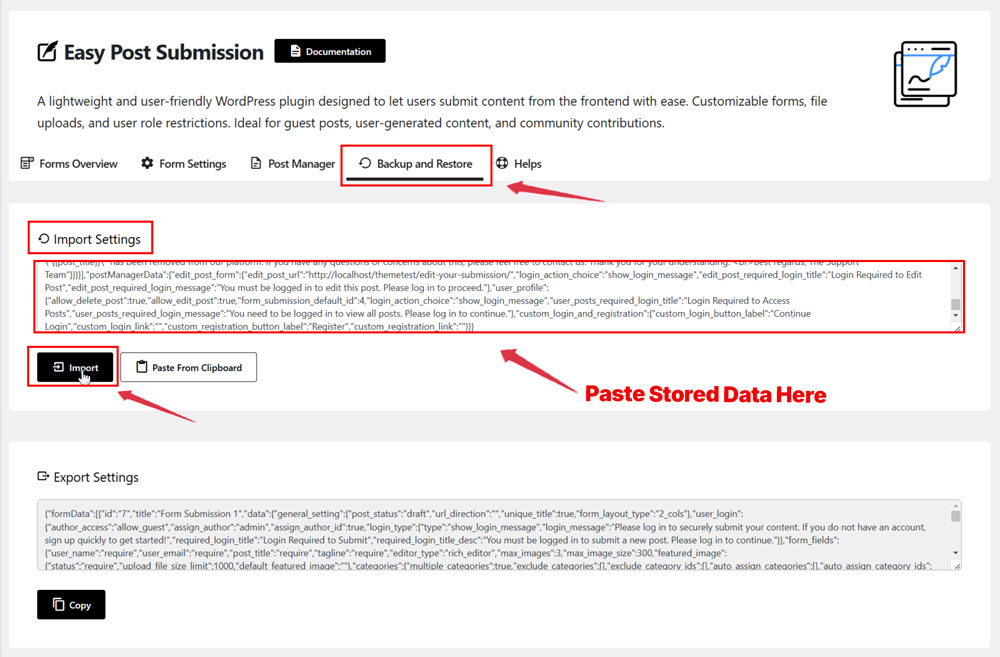
Congratulations! You’ve successfully restored the Post Submission Form you needed; it’s that simple, right? With this setup, you can even back up your data without writing a single line of code, making the process effortless and user-friendly.
Conclusion
In my thoughts, understanding how to backup and restore data isn’t just a technical skill; it’s your ultimate shield against losing work to glitches, slip-ups, or device failures. And for Easy Post Submission, with Exporting and Importing Settings, you can recover settings effortlessly and keep your content flowing without writing code. Implement these tips today for a worry-free workflow.