
With online shopping becoming increasingly popular, having a robust eCommerce solution is essential for businesses. WooCommerce is the best choice for your online store. If you’re unsure where to start, follow me, and let’s install WooCommerce together.
What to Prepare Before Getting Started with WooCommerce Store?
Before diving into setting up your WooCommerce store, there are three major essentials you’ll need to ensure a smooth and successful launch:
Getting Started Setup WooCommerce Store
1. Install WoCommerce plugin
If this is your first time setting up an online store, welcome! We recommend starting with a clean WordPress installation, a default theme, and no extra plugins. This minimizes compatibility issues and ensures WooCommerce runs smoothly from the start.
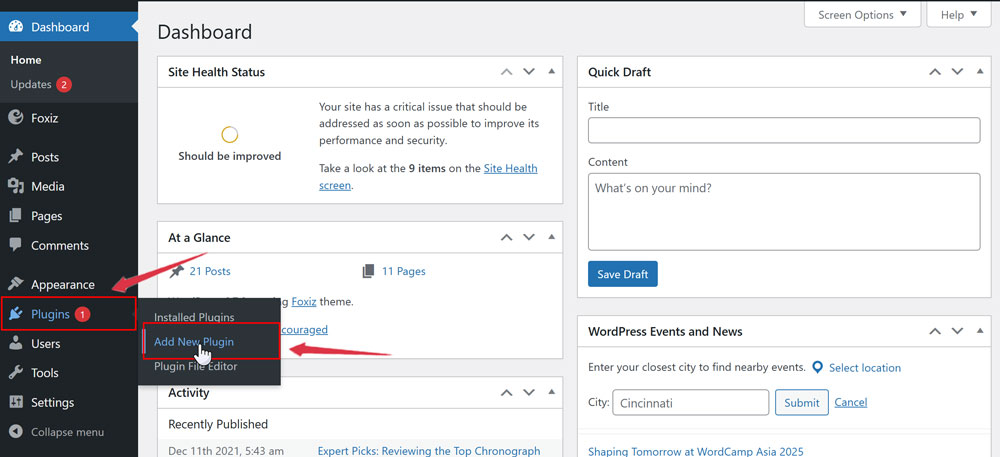
Ready to turn your WordPress site into a powerful online store? First, log in to your WordPress dashboard and navigate to Plugins > Add New:
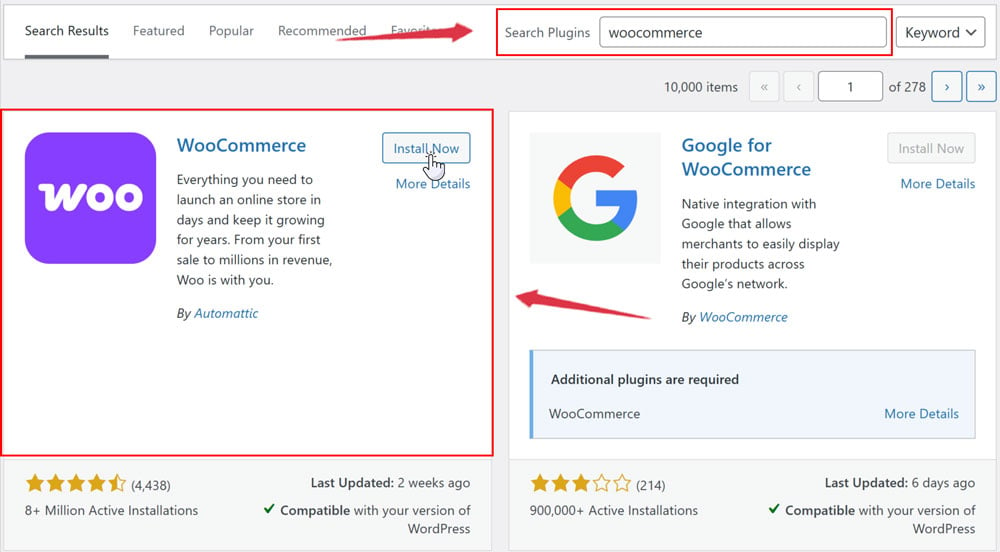
On the next screen, type WooCommerce into the search bar. Once the plugin comes up, click on the Install Now button:
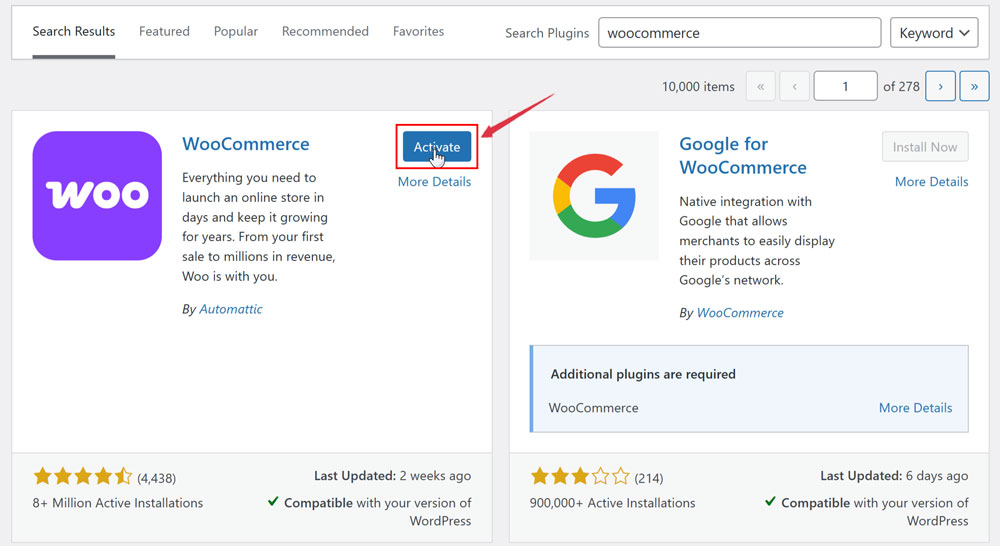
After installing WooCommerce, make sure to Activate it to launch the setup wizard. This handy tool will guide you through configuring your store’s essential settings, making the process quick and hassle-free:
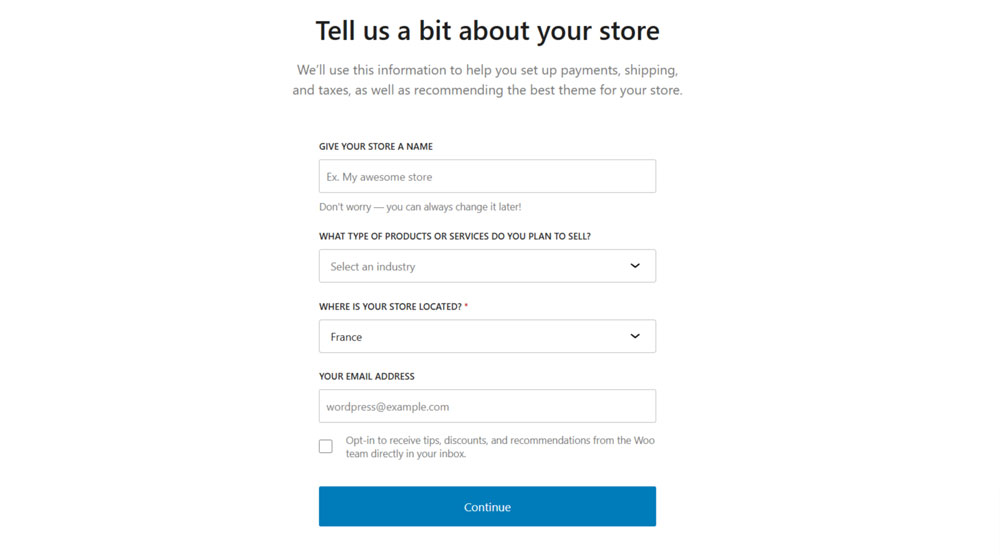
It begins with a few basic questions to setup your store like your name store, location, email, or product types,…after filling it out, click Continue.
2. Configure Store Address in WooCommerce
Store Address Configuration in WooCommerce is a key step to ensure smooth operations and accurate customer interactions.
Go to WooCommerce > Settings > General. In here, you’ll find fields to enter your store’s address details, including country, state, city, and postal code:
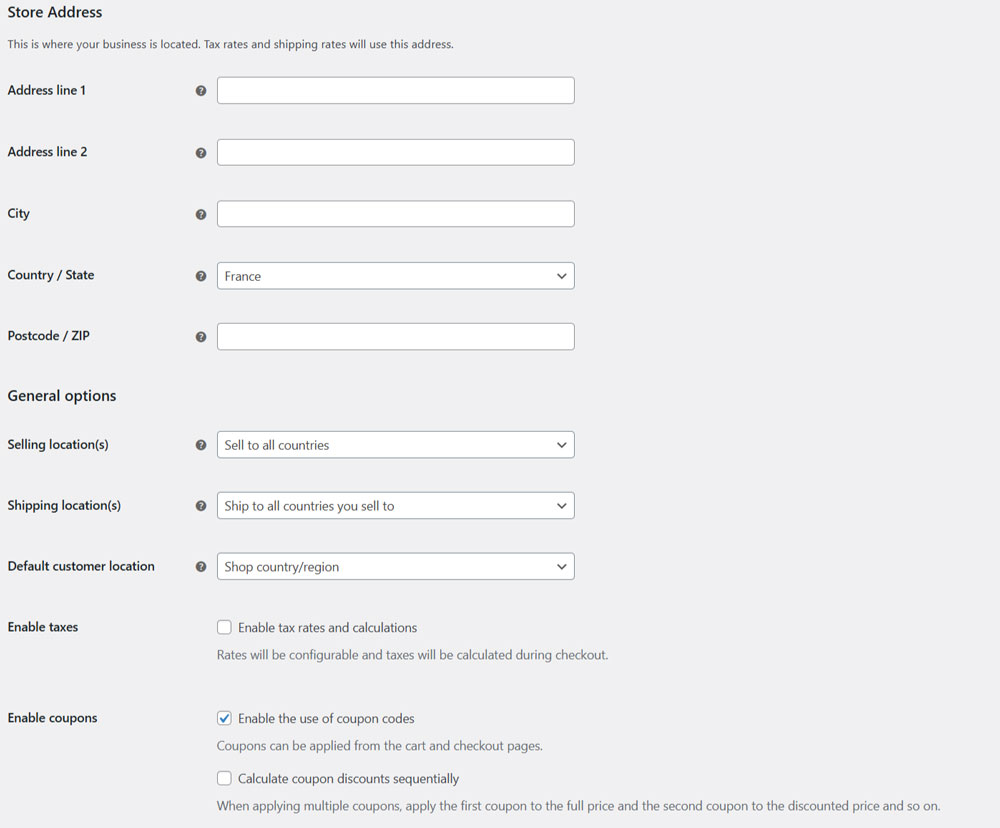
This information is essential for calculating shipping rates, taxes, and ensuring compliance with local regulations. You can enable coupons to allow customers to use discount codes on their purchases.
A properly set store address not only builds trust with your customers but also helps streamline backend processes like order fulfillment. Take a moment to verify your details, it’s a small but impactful step toward running a professional and efficient online store.
3. Select your Currency and Payment Gateway
Select Currency
Configuring your store’s currency in WooCommerce is a straightforward yet vital step, especially if you’re targeting an international audience.
To get started, navigate to WooCommerce > Settings > General. In the Currency Options section, you’ll find a dropdown menu with a wide selection of currencies — from USD and EUR to GBP and beyond. Simply choose the currency that aligns with your primary market or the one your customers are most comfortable with.
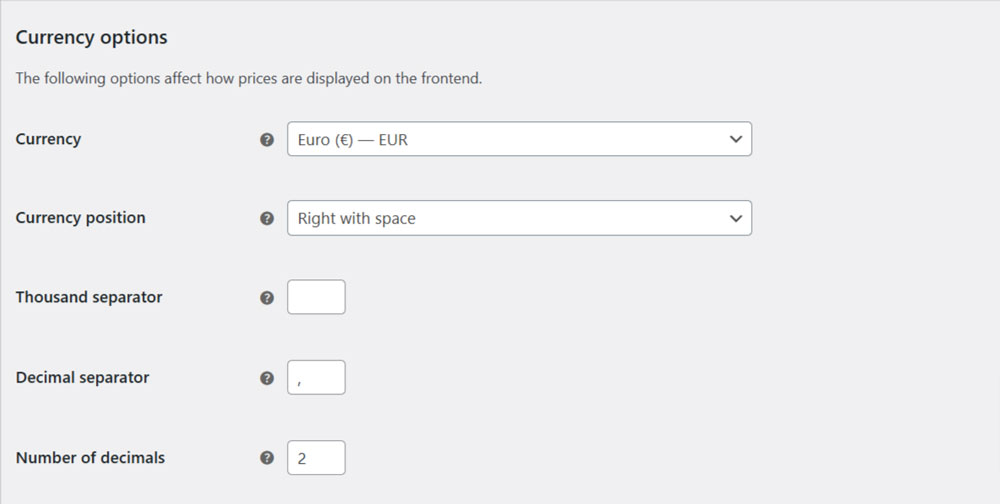
Once selected, WooCommerce will automatically show product prices, shipping costs, and taxes in the chosen currency. This ensures a seamless and localized shopping experience for your customers, boosting trust and conversion rates.
Pro Tip: If you’re selling globally, consider using a multi-currency plugin like Currency Switcher for WooCommerce or TIV Multi-Currency for WooCommerce to allow customers to view prices in their local currency.
Select Payment Gateway
Choosing the payment gateway in WooCommerce is a critical step to ensure smooth transactions and a seamless checkout experience for your customers.
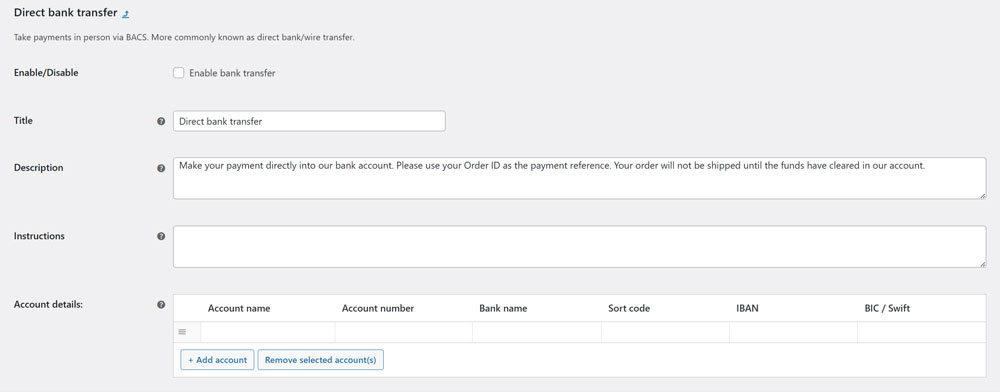
In WooCommerce > Settings > Payments. You’ll see a list of available payment options, from popular gateways like PayPal and Stripe to bank transfers and cash on delivery:
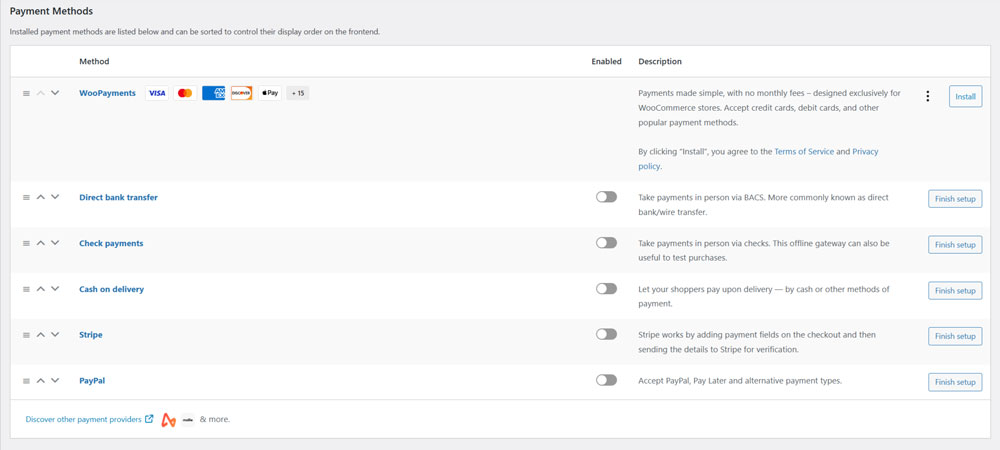
Enable the ones that best suit your business and customer preferences. And don’t forget to configure each gateway’s settings, like API keys or account details, to make sure everything runs smoothly.
Offering multiple payment options not only boosts customer trust but also increases conversion rates. After all, the easier it is for customers to pay, the more likely they are to complete their purchase!
4. Set up your shipping zones
Setting Up Shipping Zones in WooCommerce is a game-changer for managing delivery costs and customer expectations.
Go to WooCommerce > Settings > Shipping > Shipping Zones. You can create different zones based on geographic areas; like your local region, entire country, or international destinations, and assign specific shipping methods and rates to each.
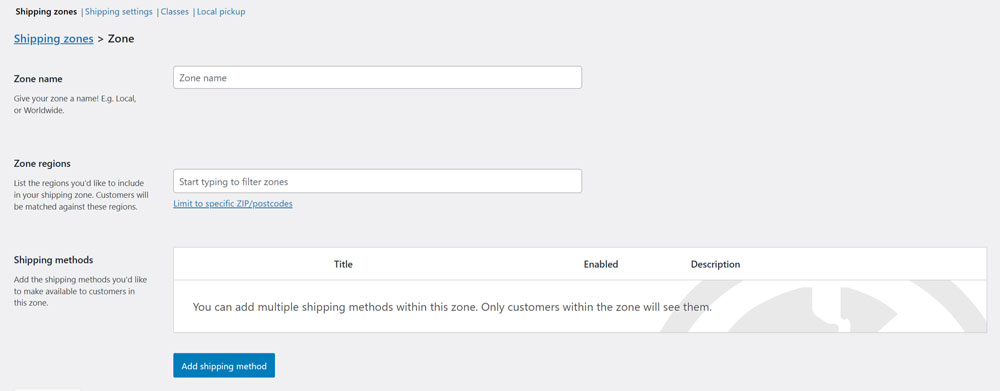
For example, you can offer flat-rate shipping for customers in your state, free delivery for domestic orders, calculated rates for international shipments. This level of customization not only simplifies logistics but also ensures your customers see accurate and fair shipping costs at checkout.
Beside that, you can go to WooCommerce > Settings > Shipping > Shipping Settings to configure like enabling or disabling shipping calculations, setting a default shipping destination, or adding handling fees.
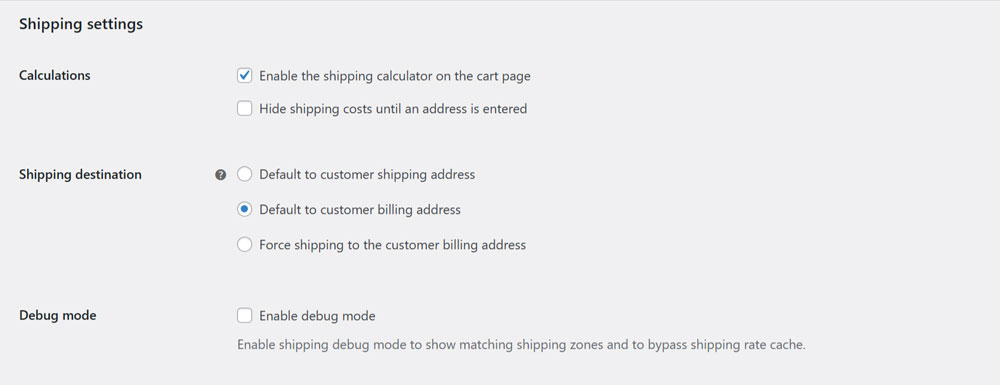
These settings provide additional flexibility to fine-tune your shipping strategy and ensure a seamless experience for your customers.
Finally, WooCommerce offers you the option of using its Shipping extension to print labels at home and save time. It can be a nice efficiency booster, so it’s worth considering.
5. Add powerful extensions (Optional)
While WooCommerce is a powerful eCommerce solution out of the box, extending its functionality with additional plugins can take your store to the next level.
Go to WooCommerce > Extensions to explore a wide range of powerful plugins designed to enhance your online business:
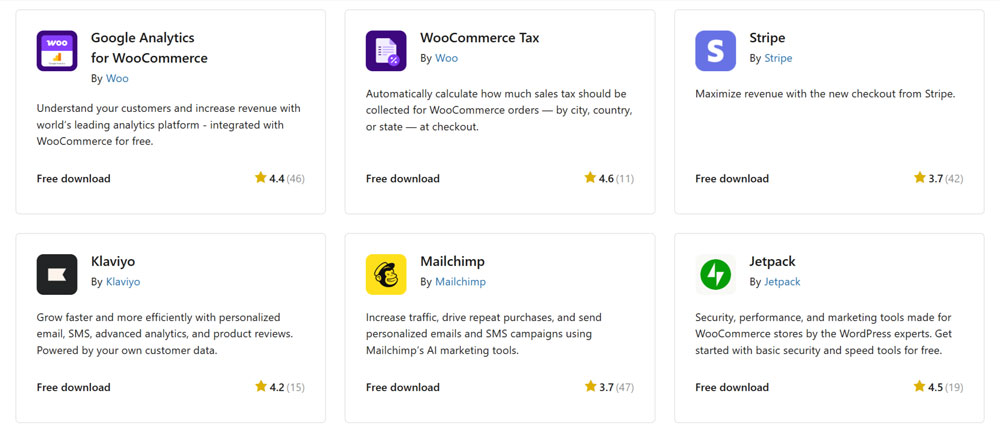
You can install WooCommerce Subscriptions to offer recurring payment options, or Product Add-ons to let customers customize their purchases.
If you’re focused on marketing, consider Mailchimp for WooCommerce to streamline email campaigns or Advanced Coupons to boost sales with targeted discounts.
Adding these extensions is simple, but it helps you can save time, increase sales, and create a more dynamic and user-friendly shopping experience. Why not give it a try?
6. Final check everything
Before launching your WooCommerce store, it’s crucial to perform a final check to ensure everything runs smoothly. Start by reviewing all the settings you’ve configured, from payment gateways and shipping options to tax rules and currency settings. Test the checkout process by placing a dummy order to confirm that payments, shipping calculations, and order confirmations work flawlessly.
Taking the time to thoroughly review your setup can prevent issues down the line and ensure a seamless experience for your customers. Trust me, it’s not overkill — it’s a step you won’t regret!
Conclusion
Setting up an online store can seem overwhelming at first, but WooCommerce, and WordPress make the process much simpler and more manageable. If you’ve successfully set up your store, Congratulations! Now, it’s time to add your unique products and make your shop truly your own. If you’re curious about setup or managing products effectively, be sure to check out here.
Wishing you all the best as you embark on this exciting eCommerce journey — may your store thrive and bring you endless success!