

As the next-generation measurement solution, replacing Universal Analytics, GA4 offers advanced features to optimize your website’s SEO and gain valuable insights. In this comprehensive guide, we will walk you through the process of setting up Google Analytics 4 (GA4) for your WordPress website.
Why is Google Analytics Important for Your Website?
In today’s digital age, gaining a deep understanding of your website visitors’ behavior is paramount to achieving success. By integrating Google Analytics with your WordPress website, you unlock a plethora of advantages:
- Tracking and Analyzing Website Data: Google Analytics provides a toolset to effectively track and analyze various aspects of your website’s performance.
- Making Data-Driven Decisions: With Google Analytics integrated into your WordPress site, you can make informed decisions based on the valuable insights derived from the data.
- Measuring Marketing Campaign Effectiveness: You can accurately measure the impact of your marketing campaigns.
Install and Configure GA4 on Your WordPress Website
In the article, we assume that you already have a Google account and have completed the steps to create a Google Analytics 4 Property. To connect your website to Google Analytics, there are two methods: via Google Tag Manager (GTM) or the Google Tag (gtag.js).
Both methods serve the same purpose, but you can use the Google Tag (gtag.js) if you want a quick connection or only need Google Analytics service.
Alternatively, you can use Google Tag Manager (GTM) if you want to integrate other Google services into your website.
💡 Note: You should only add one of these code types to a website.
There are several effective ways to add Google Analytics to your website without using excessive plugins that may impact website performance. As a WordPress theme developer on the Envato market, we suggest the following methods:
Method 1: Use the HT Easy GA4 Plugin
HT Easy GA4 is a lightweight plugin available in the free WordPress plugin library. It is the easiest and best way for beginners to add Google Analytics to WordPress. Simply copy the Google Analytics 4 Measurement ID.
The plugin only adds the Google Tag (gtag.js) code, so if you want to use Google Tag Manager (GTM), you need to use a different method.
Firstly, you need to install and activate the HT Easy GA4 plugin.
Next, log in to your Google Analytics account and go to the ‘Admin‘ settings page. Click on the ‘Data Streams‘ option.
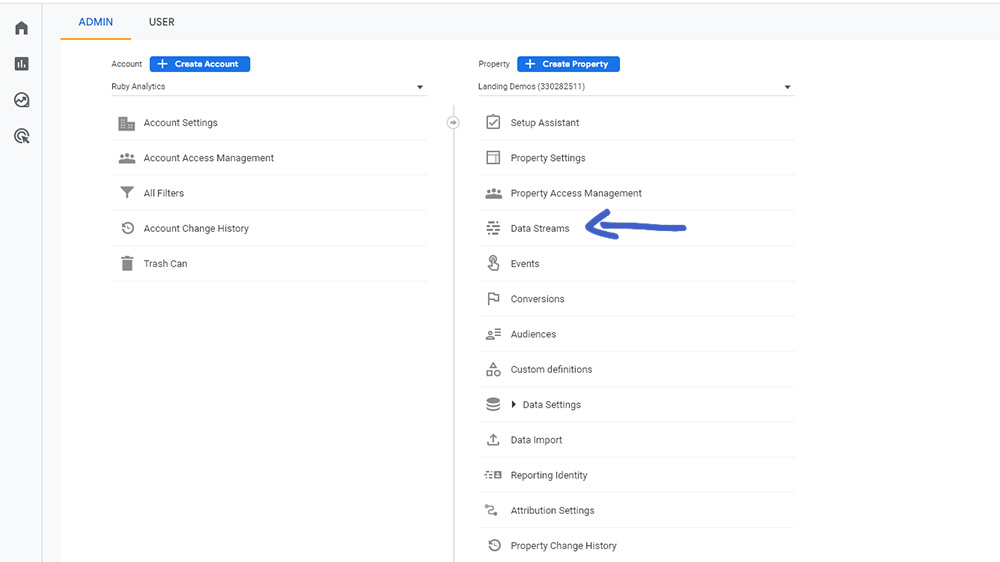
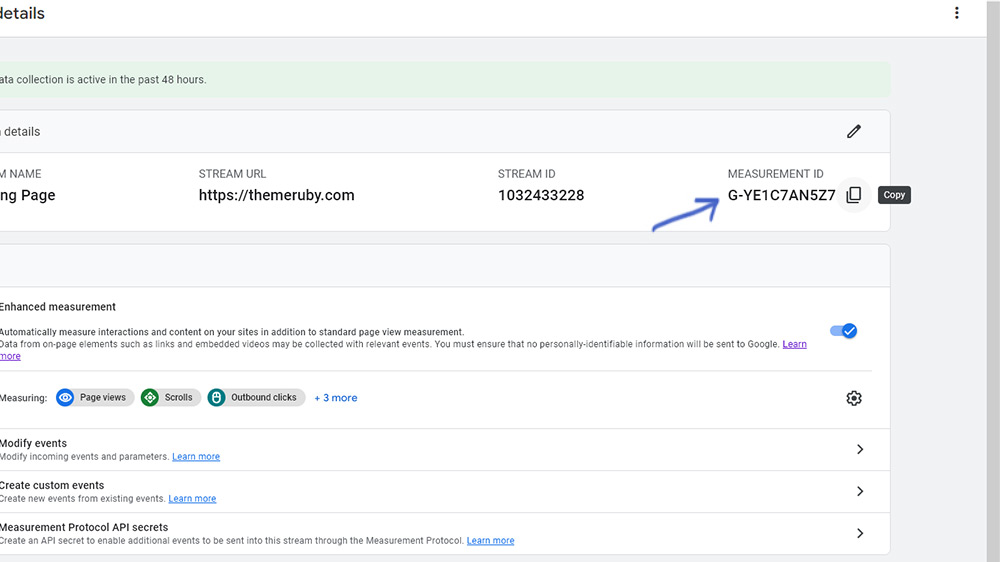
In this section, select the web stream you have created and copy the Measurement ID.
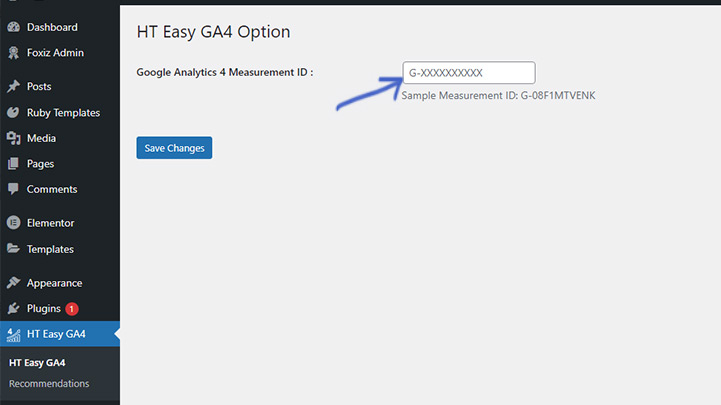
Go to the WordPress dashboard > HT Easy GA4 and paste the copied value into the ‘Google Analytics 4 Measurement ID‘ setting field.
Method 2: Use the Google Site Kit Plugin
Google Site Kit is the official WordPress plugin from Google. The plugin automatically installs the Google Analytics code on your website once you connect it to your Google account.
Method 3: Use the Header and Footer Scripts Plugin
Header and Footer Scripts plugin allows you to add code snippets like Google Analytics, social media scripts, CSS stylesheets, or custom fonts to the header and footer without editing the WordPress theme files.
By using this method, you can efficiently add Google Analytics code to your website without significantly affecting its performance. It supports both Google Tag Manager and Google Tag code.
Firstly, you need to install and activate the Header and Footer Scripts plugin.
You can choose to use either the Google Tag Manager (GTM) code or the Google Tag code (gtag.js).
For the Google Tag code (gtag.js)
Log in to your Google Analytics account and go to the ‘Admin‘ settings page. Click on the ‘Data Streams‘ option.
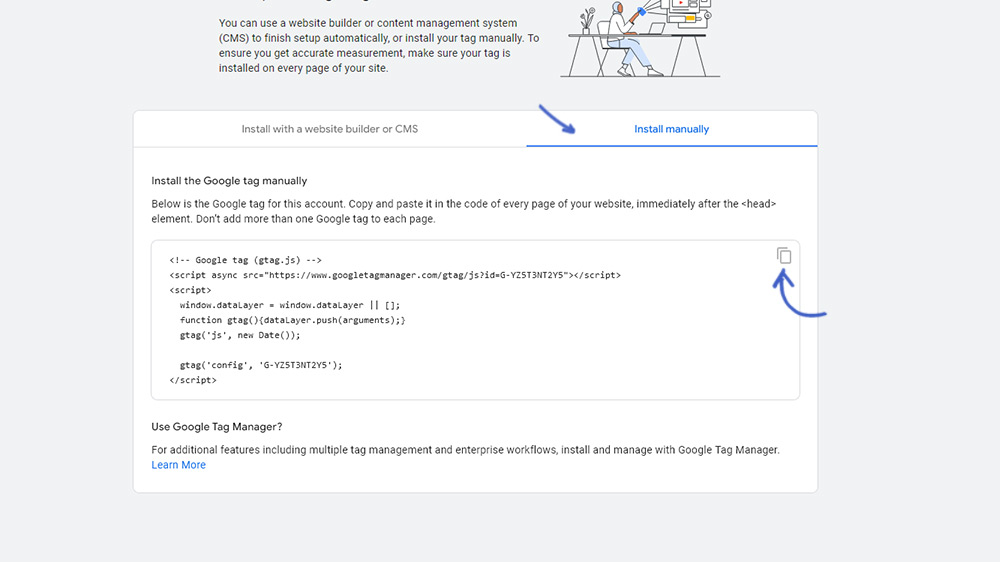
In this section, select the web stream you have created, and then choose View tag instructions
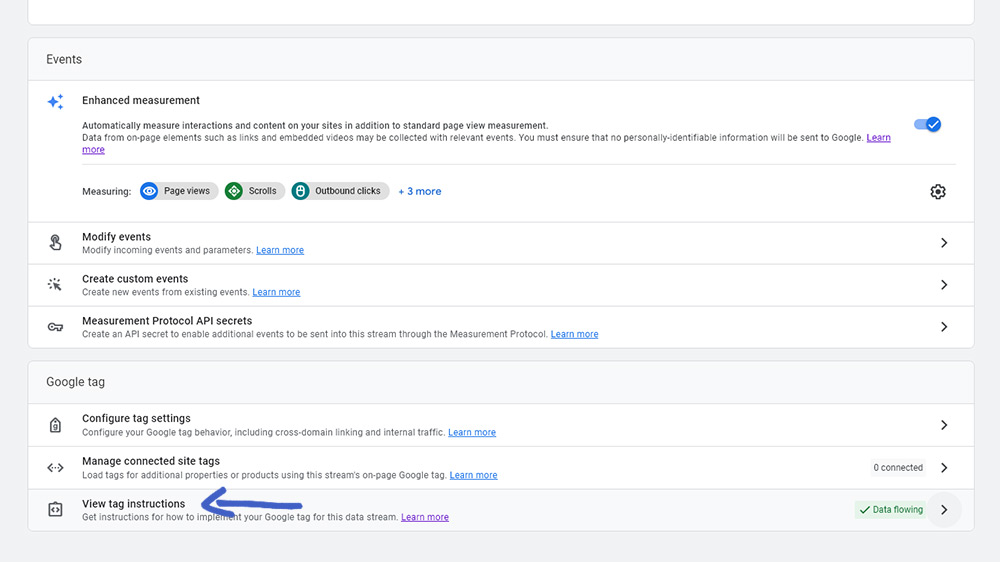
Select ‘Install manually‘ and copy the code provided.
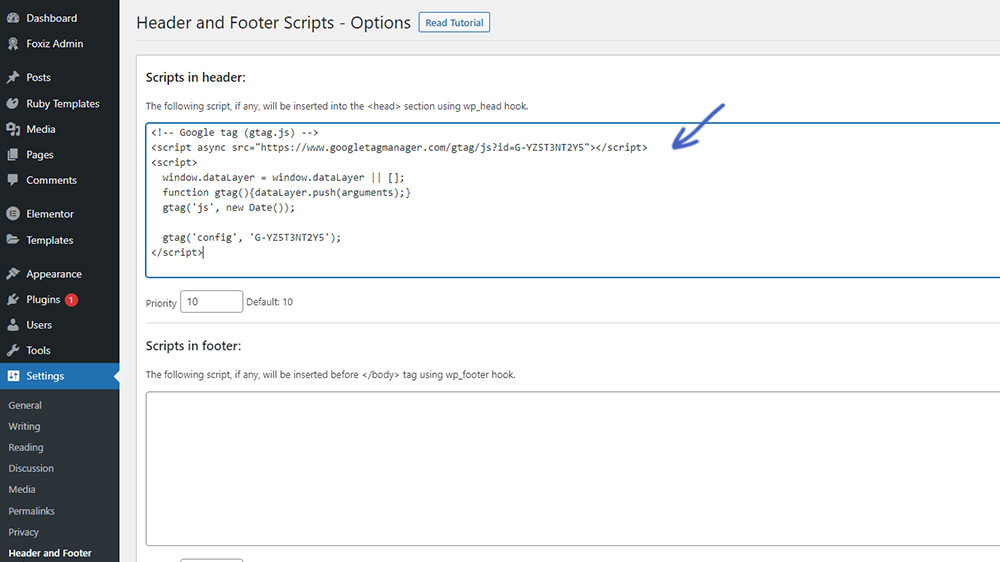
Next, go back to your WordPress website, navigate to the Dashboard > Settings > Header and Footer Scripts.
Paste the copied code into the ‘Scripts in header‘ section.
For Google Tag Manager (GTM)
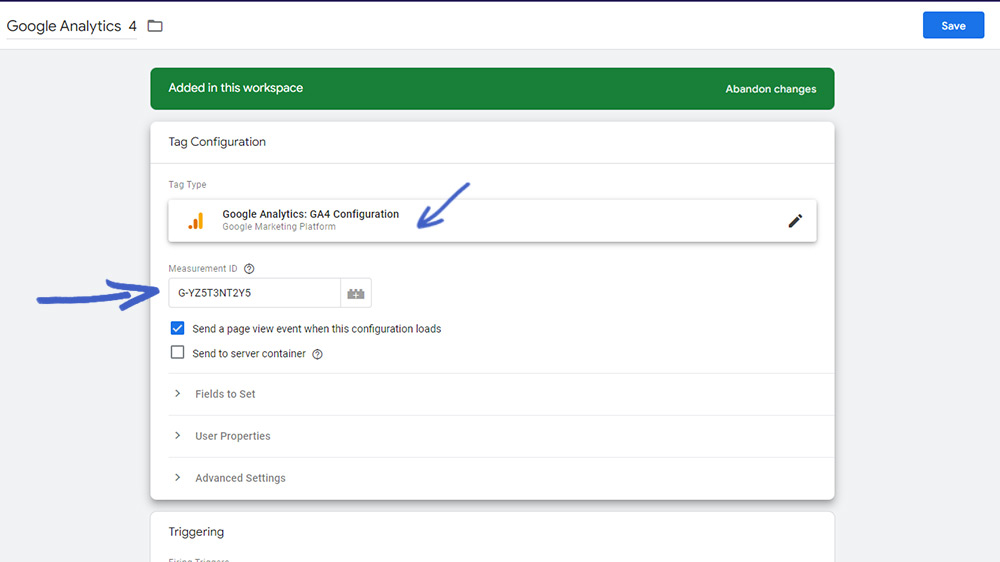
Access to your Google Tag Manager admin. In the Workspace section, create a new tag to connect Google Analytics with Google Tag Manager.
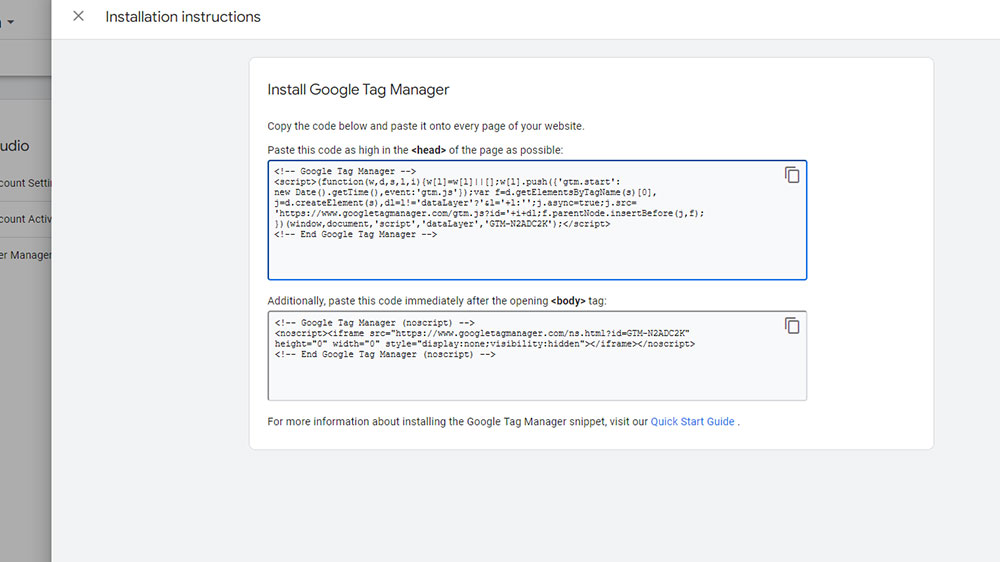
Go to the Admin section and click on “Install Google Tag Manager“
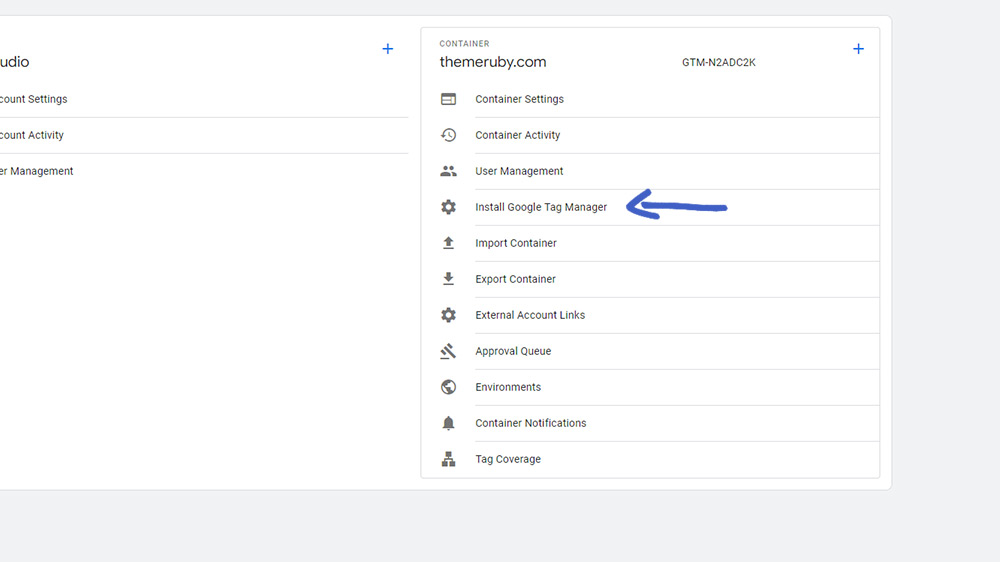
Copy the code provided in the section that says: “Paste this code as high in the of the page as possible.”
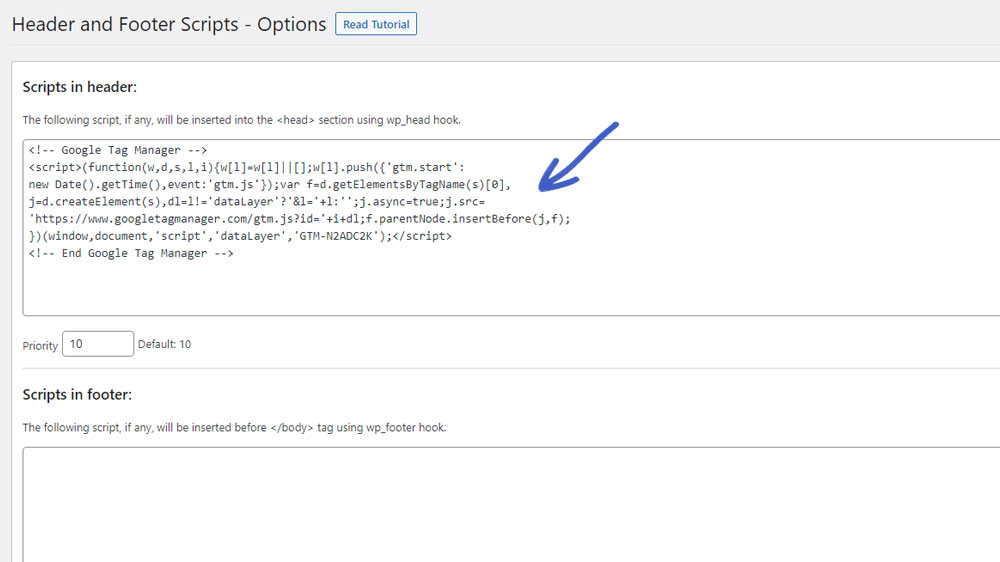
Next, go back to your WordPress website and navigate to the Dashboard > Settings > Header and Footer Scripts.
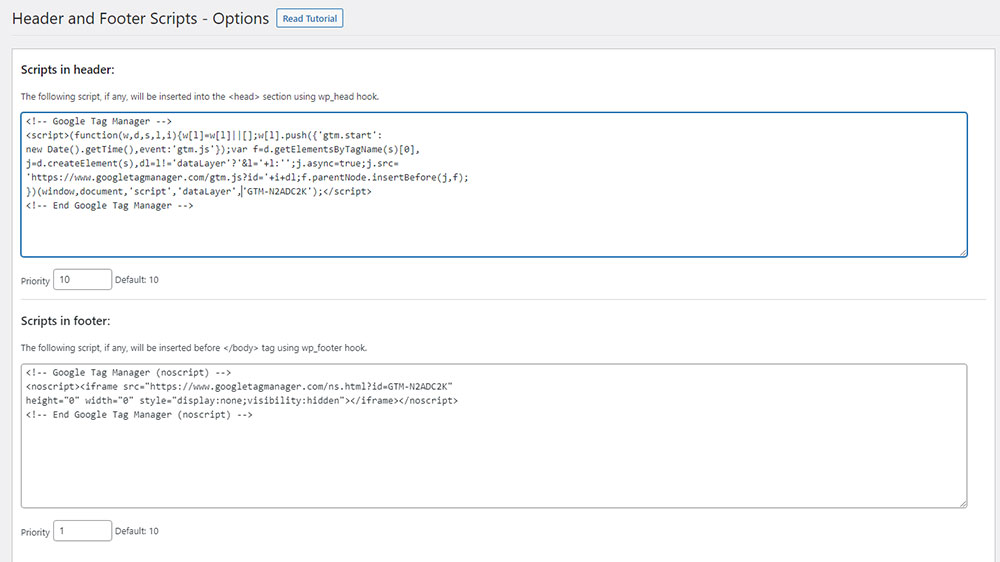
Paste the copied code into the “Scripts in header” section.
Continue by copying the code from the section that says, “Additionally, paste this code immediately after the opening <body> tag.”
Paste the copied code into the “Scripts in footer” section.
Conclusion
Integrating Google Analytics with your WordPress website empowers you with valuable data to make informed decisions and optimize your online presence. By understanding your audience, tracking conversions, and evaluating website performance, you can enhance user experience, improve marketing strategies, and achieve your business goals.
Follow the steps outlined in this article to harness the power of Google Analytics in your WordPress site and take your online success to new heights.