
In the old days, adding a call-to-action meant boring copying and pasting. Social media links were the same chore for every WordPress post. Now, the Reusable Block helps. Known as Synced Patterns in the 6.3+ version, it lets you create a block once. Reuse it anywhere to save time. Plus, it keeps your site consistent. No coding is required!
Let’s walk through how to create a reusable block, step by step, and make sure you’re comfortable with the entire process from start to finish.
What Is Reusable Block (Pattern)?
Bloggers often struggle with repeating snippets, like CTAs or social links across posts, and manually copying them from text files feels like a slog that wastes time.
But now, with Pattern, previously known as Reusable Block, are powerful features in the WordPress Block Editor that allow you to save a collection of blocks for easy reuse throughout an entire website.
Thanks to Gutenberg, just craft a pattern once, pop it into posts or pages, and keep your site’s design crisp and consistent without starting over. Here’s where they really shine:
All set? Let’s dive into how you can easily create a reusable block in the WordPress Block Editor!
How to Create a Pattern (Reusable Block) in WordPress Gutenberg Editor
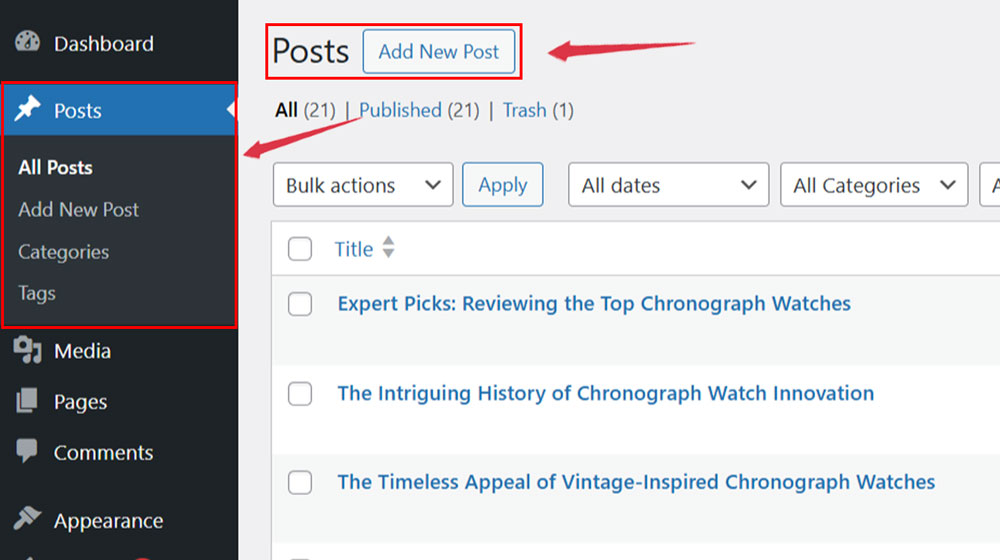
Start by logging into your WordPress Dashboard. Navigate to Post > Add New Post to launch the Gutenberg Editor, where you’ll create your Pattern. Or you can use an existing post to open the Gutenberg Editor.
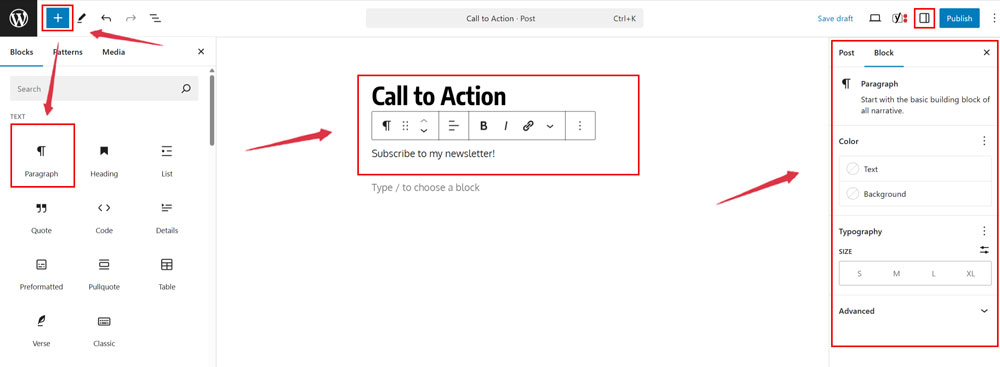
Click the Add block (+) button in the top left corner to open the block menu. For this example, select a Paragraph block and type a simple CTA, like “Subscribe to my newsletter!” Customize it using the toolbar above or the settings panel on the right, like adding links, tweaking fonts, or adjusting colors to fit your style.
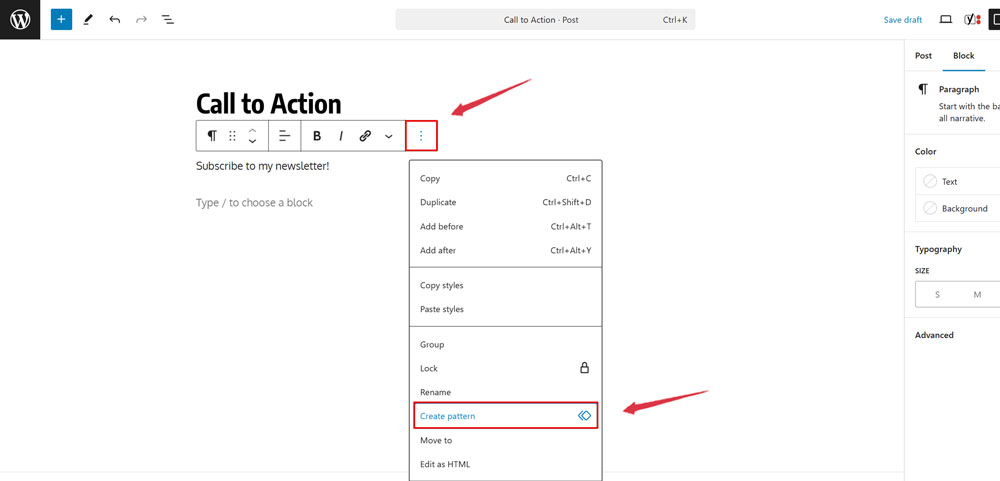
Once your block is ready, click it to select it, then click the three-dot menu in the toolbar. Choose Create Pattern.
Next, you have to give it Name like “Newsletter CTA”, select Categories like Call to Action, and decide if it’s Synced, which means it will update anywhere, or Unsynced. Finally, click Add to save it.
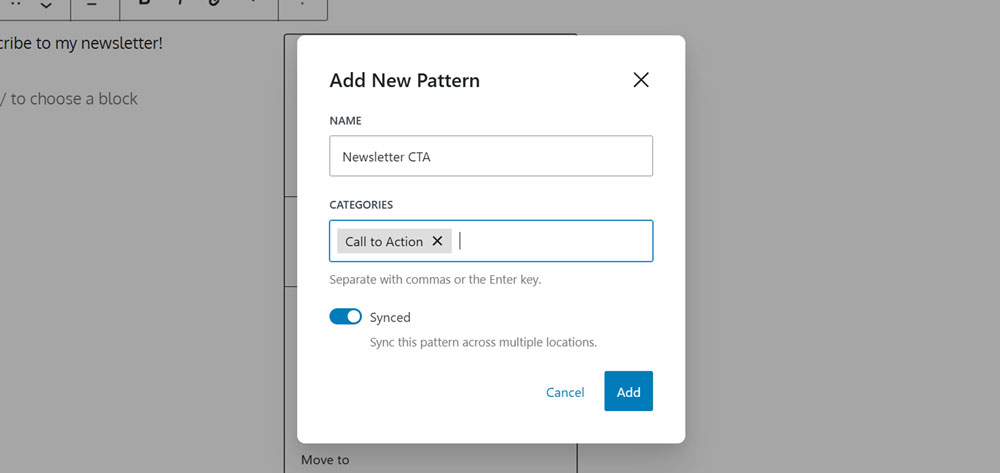
Once added, you will now save your pattern in the WordPress database with all its settings.
How to Add Pattern (Reusable Block) in WordPress Posts and Pages
Now that we have learned how to create a pattern in WordPress. Next, let’s see how to add it to your WordPress posts and pages.
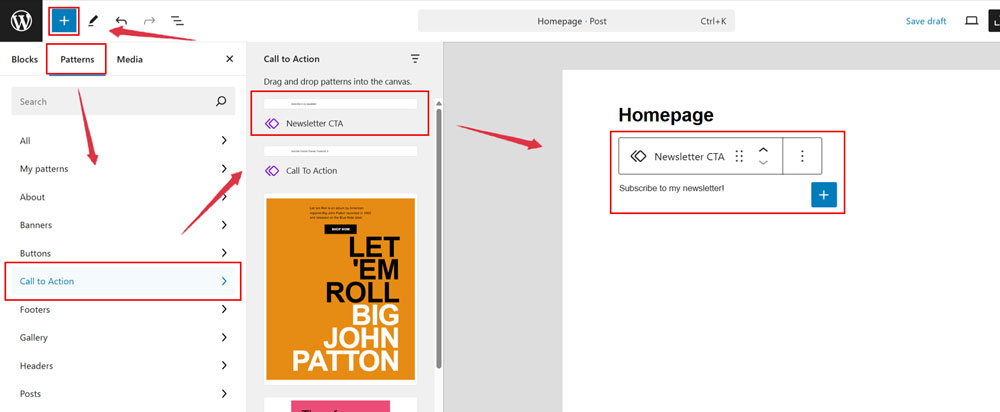
Once again, to use your Pattern, open a new or existing post in WordPress Gutenberg Editor. Click the Add block (+) button, switch to the Patterns tab, and locate your Newsletter CTA (name’s pattern) under its category (or “Uncategorized” if none was chosen). Click it to insert it instantly.
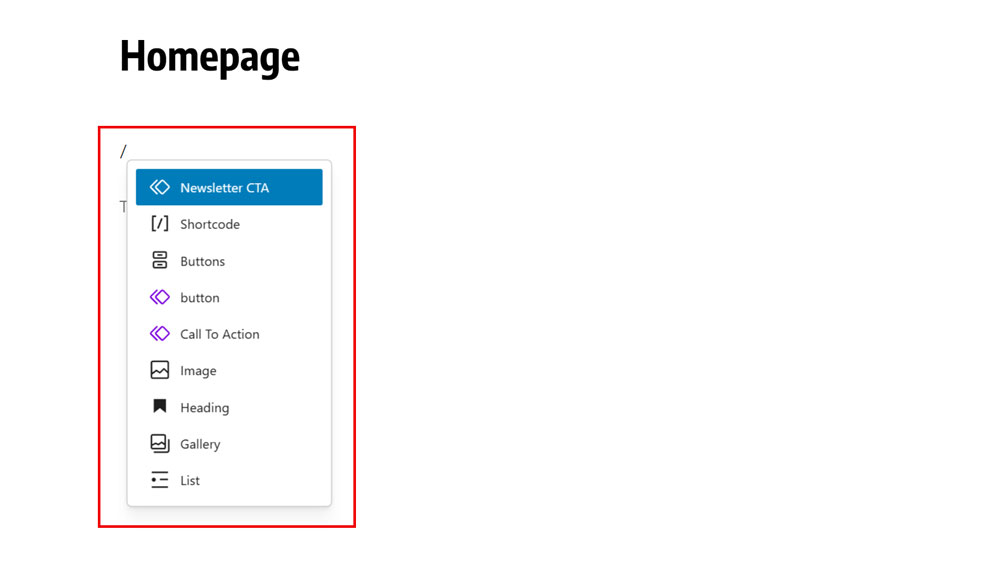
Alternatively, type “/” followed by the Pattern’s name for a quick shortcut.
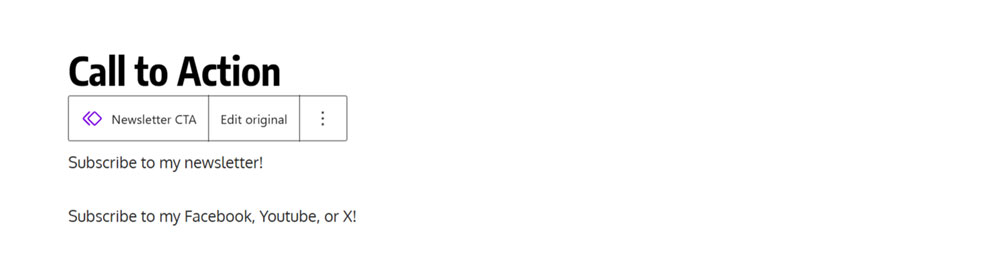
Beside that, you can also edit the Reusable Block by clicking the Edit Original option in the block toolbar at the top.

Clicking this opens a new screen in the block editor, letting you edit or tweak the pattern’s content. You can also add other blocks to customize it further. When finished, click the Save button to store your changes.

Open the post again to see your updated pattern working.
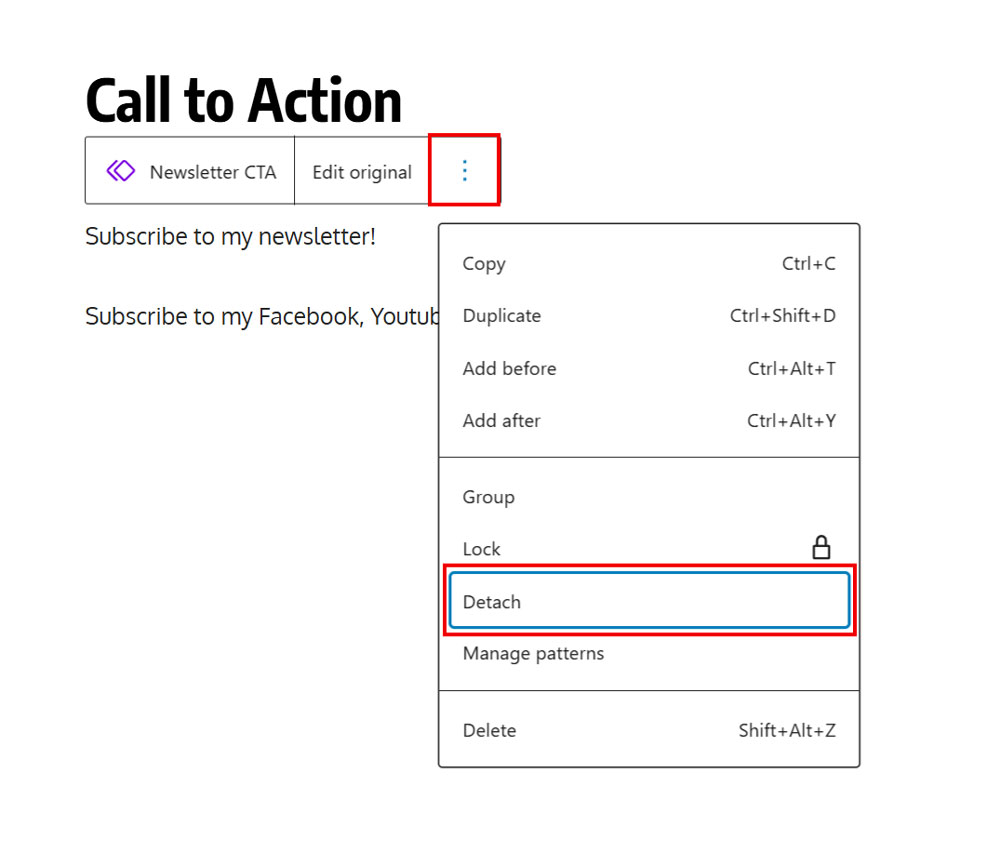
One more thing: you are able to change the pattern for only that post; click the three-dot icon in the toolbar. Select Detach option from the menu, and it becomes a normal block, and edits won’t affect the original.
Managing All Patterns in WordPress Editor
After using patterns for a while, you might want to delete some, rename others, or duplicate them. WordPress makes it easy to handle all your patterns in one spot. For themes that have pattern management, like Foxiz Theme. Go to Appearance > Patterns.
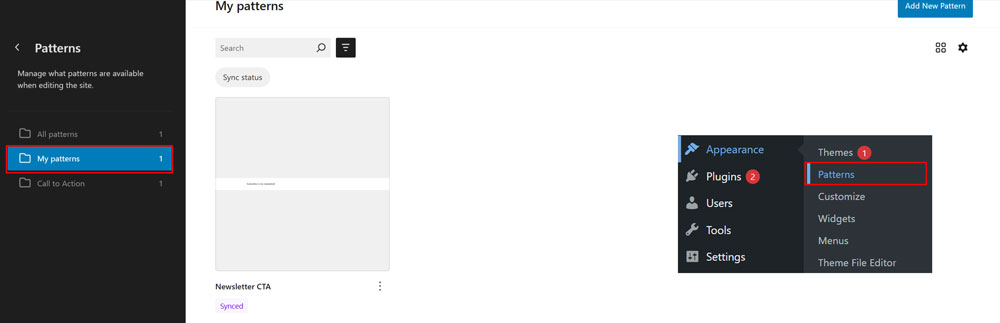
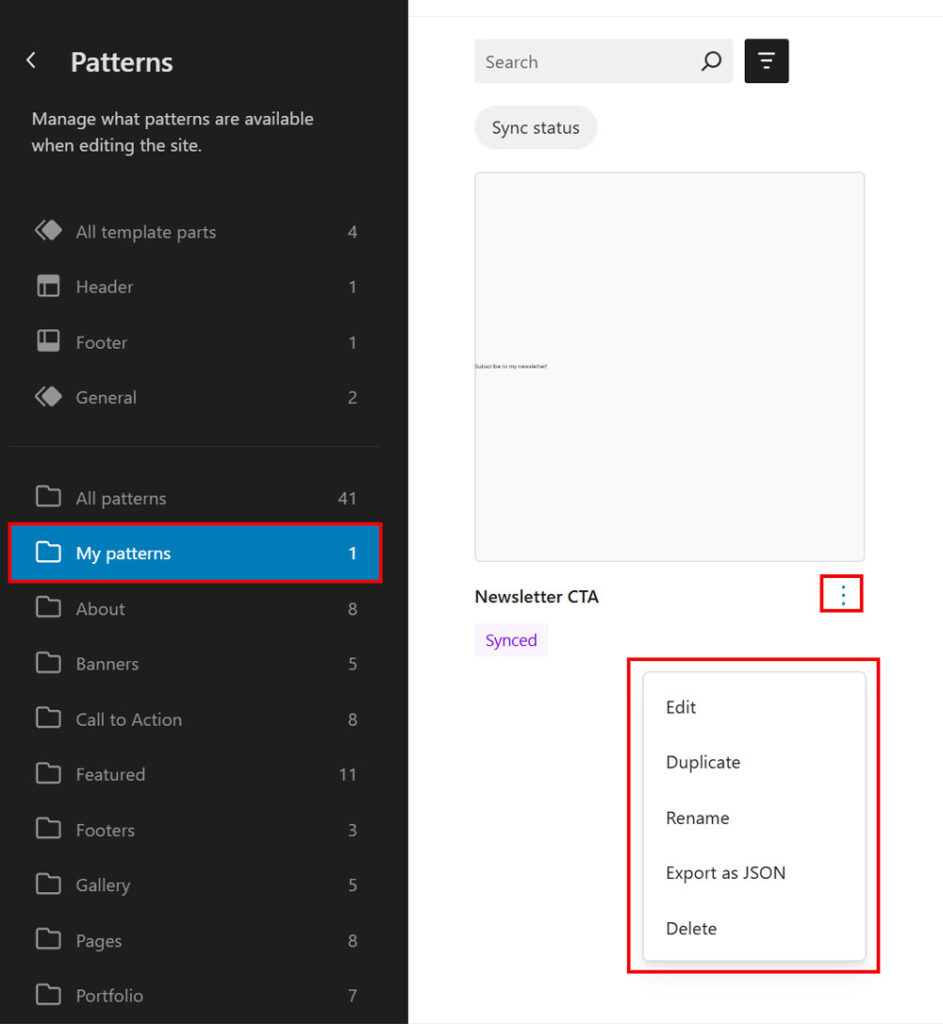
This will direct you to a new page where you can easily manage all the reusable patterns on your WordPress website. Next, switch to the My Patterns tab, then click the three-dot menu in Patterns Page.
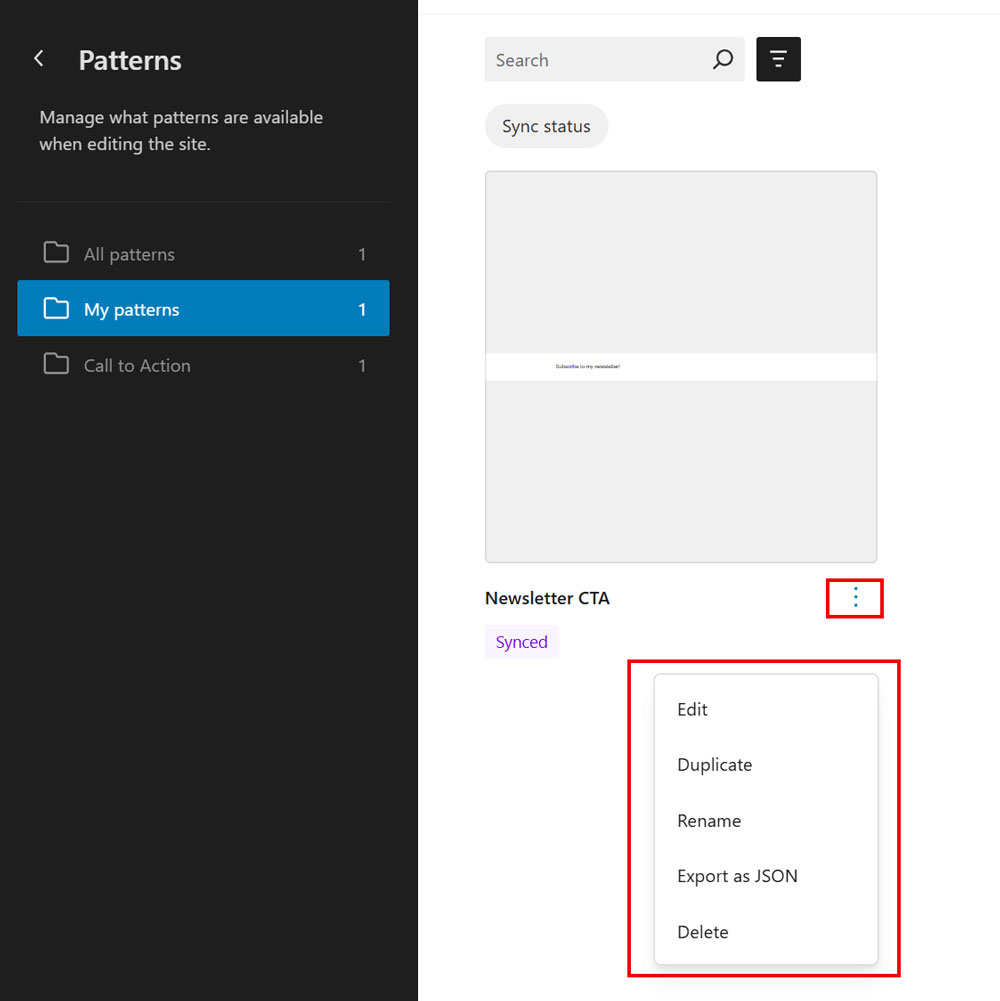
Here, you can edit, delete, rename, or even export your blocks to another website.
Beside that, if you’re using a block theme, go to Appearance > Editor to customize your patterns.
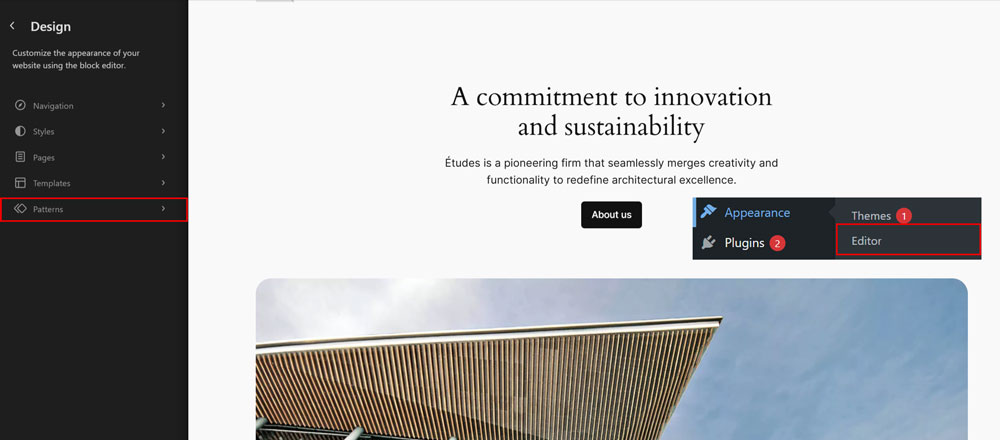
This will open the full site editor, where you must click the Patterns tab in the left column to expand it. Next, switch to the My Patterns tab, then click the three-dot menu.
And here, you can edit, delete, rename, or even export your blocks to another website if you’re using a block theme (like Twenty Twenty-Four Theme,…)
How to Import / Export Patterns (Reusable Block) in WordPress Editor
Designs aren’t just recyclable on the site where you built them. You may even apply them to different WordPress sites.
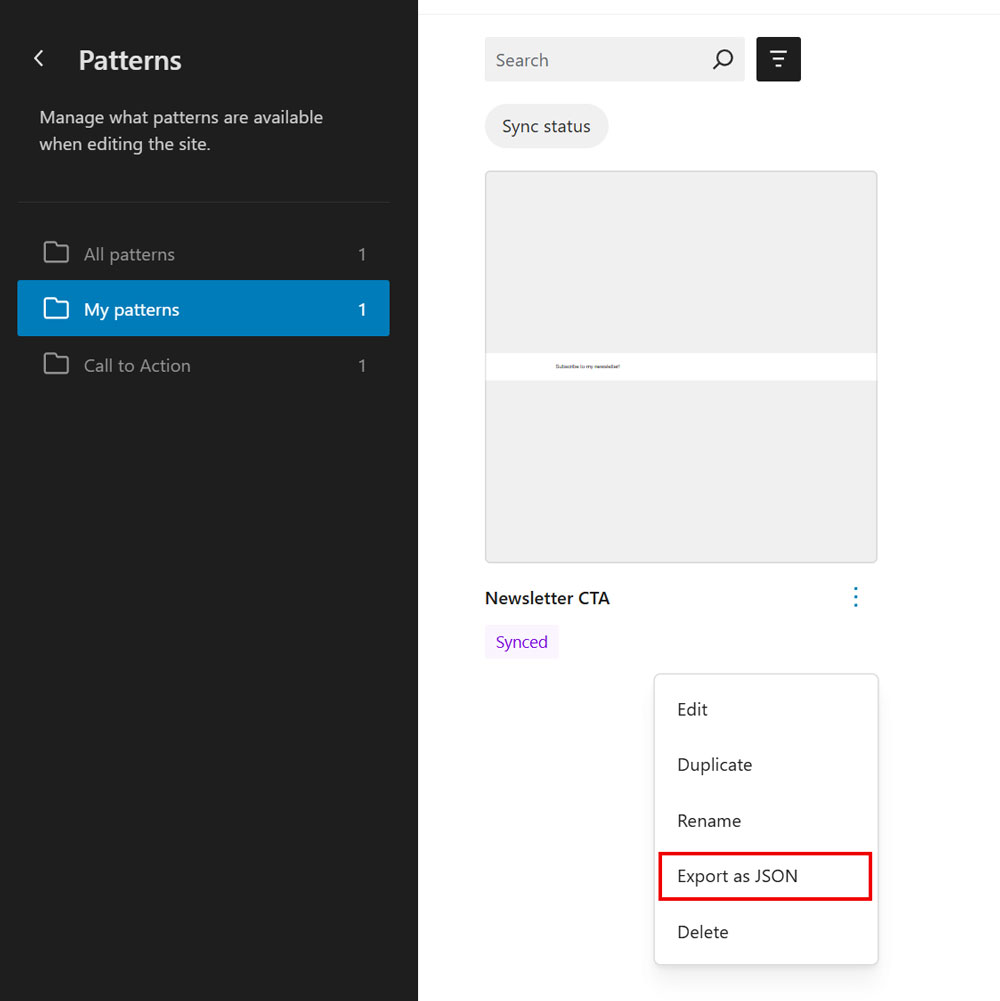
To export reusable blocks from the Patterns page, simply click the Export as JSON option in the three-dot menu. WordPress will download the block as a JSON file, which you can store on your computer for future use.
You can now switch to another WordPress site’s admin area. From here, click Add New Pattern button, then click Import pattern from JSON.
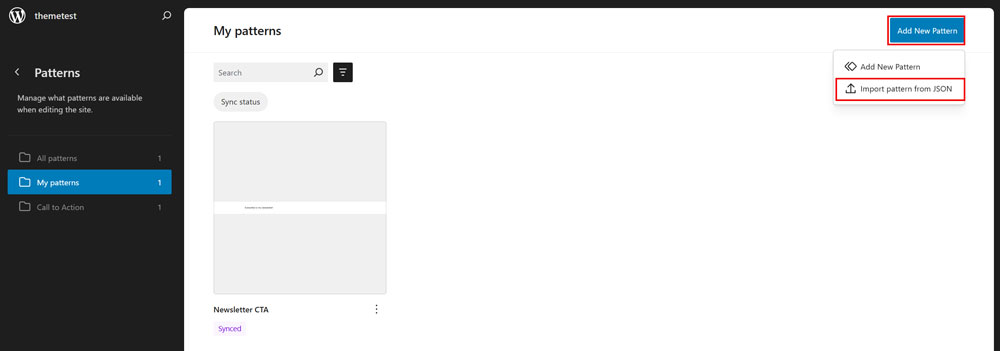
Choose the JSON file you previously exported, and WordPress will automatically upload and add the reusable block to your patterns library. Once imported, you can edit, customize, or insert it into your posts and pages just like any other pattern.
Conclusion
In conclusion, mastering Reusable Blocks in the WordPress Gutenberg editor is a smart move for anyone looking to speed up their workflow and keep things consistent across their site. They’re easy to create, manage, and reuse, especially with no coding required.
I hope this guide made the process simple to follow. Thanks for reading, and best of luck with your WordPress projects. Have a nice day!